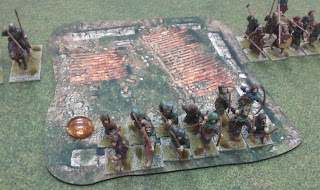
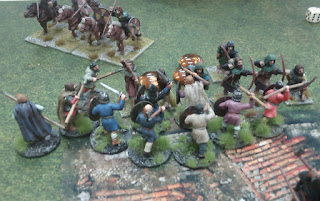
Saturday 4 December 2021

Warmaster Ancient Battles - Carthaginian vs Byzantine

This was 1,500 points, I had Early Byzantines. I bought most of the army ready made at a tournament and it was a good buy, but it only included one unit of light cavalry, and I haven't gotten round to fixing that yet.


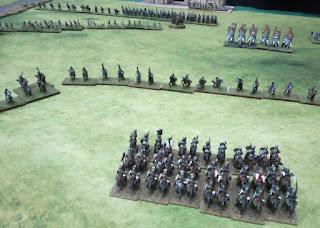
All the cavalry on  both sides are on the left of the picture, except for my Cataphracts which were with the infantry.


Bob has a lot of light cavalry facing me, some serious cavalry and elephants. My heavy cavalry have bows with 15cm range, a 5+save and are shock cavalry, meaning they are on narrow deep bases, getting more units in contact.

I have to get them into combat but the enemy light horse are able to evade them when I charge leaving me open to flank charges.

My initial units are now spread out all over the place.


The elephants are getting closer but I'm unable to charge them because of the enemy light cavalry, so they will be charging me instead.

In the following turns I get charged from all directions repeatedly. I lose most of my heavy cavalry without them ever making a successful charge. I kill most of the elephants but it's my army has lost most of it's good troops.

On the other side the infantry face off until I am losing the cavalry battle. I shuffle my line into further towards the centre. 


I put some archers on a cliff which is impassable to the front thinking the ground in front of it might be important later but they were wasted. My dismal command rolls meant I was only getting about one action per turn out of two sub commanders so there was no opportunity to move them which would have taken some time.

I had the cataphracts on with the infantry but they now join the cavalry fight too (It's clear I've lost at this point and we give it about one more turn.

In the final act the Carthaginian warbands charge my infantry who have archers at the front. They smash through both with ease.

I have too get more light cavalry. The army relies on getting the heavy cavalry in piling a lot of quality into a small space, but frequently they end up broken up and vulnerable due to enemy light horse. I can have some Huns in the army which could chase off enemy light horse and clear the path.




Sunday 31 October 2021

Saga: Age ofVikings

Two games of Saga today.

Ist game Anglo Saxons v Scots

The Scots had a 1 unit of mounted hearthguard, a unit of levy archers and 4 units of warriors. My Anglo Saxons were all warriors, split into 4 units of 12.


My first concern was the archers. The Anglo Saxon battle board abilities are heavily based around having units of 10, or outnumbering the enemy. A few losses each turn from these would rapidly diminish my ability to use these


I charged in with bonuses from the battle board, warriors vs levies and I should have probably killed most of them but dismal dice rolling caused only a few casualties. I charged them again in the next round with the same result.


Battle commenced between the warriors. Multiple battle board abilities were piled up on both sides but the result was zero casualties, the exact same thing happened the next turn as well. The Scotts are good at generating piles of defence dice, in one round I rolled the maximum 16 attack dice and got nothing from them.

On the left flank the mounted hearthguard, after making failing to make much impact with their charge, moved back from the approaching large unit of warriors. My unit was able to charge the archers who had another miraculous escape (well half of the survived).


The main bodies of warriors continued to clash. By now my army was generating fewer Saga dice, from an already low starting point and my units were falling bellow the crucial strength of 10.

By the end of the game my big units were reduced to stragglers leaving the Scots victorious.


Game two, the same Anglo Saxons vs Anglo Danes.


The terrain layout was similar and another unit of arches in the same position as last time was my priority target. I had a wood to cover my advance but the designated unit wasn't able to charge due to the Fatigue being put on them.


The Anglo Danes specialise in piling Fatigue markers on the enemy and with my small pool of Saga dice my army had a hard time doing anything.

On the left  our units wiped each other out at a rate of one per turn. My units on the left and in the woods were destroyed or reduced beyond usefulness. 


My unit held in reserve moved up and destroyed the last Anglo Danish warriors then moved onto the archers. The archers had a lucky escape.

On the right I had only one unit facing off against one unit after another. Clive was able to pile on Fatigue dice and then use them to tip the combat in his favour. I was now generating too few Saga dice to do much more than try to survive.

This game went very quickly, about an hour. My army was defeated again.


Sunday 18 July 2021

Alien Squad Leader: 200 points, 700 legs

 This is a 200 point game of Alien Squad Leader. 

My army are Alien Enslavers. The enslaver infantry are from GZG's 'chitter' range of six legged aliens. The Floaters are from Alternative Armies. The thralls are home-made from plastic spiders and round headed pins for the eyeballs. The red beasts are converted from plastic ants using green stuff and the remaining beasts are from various sources. That's a lot of legs.


Richard's army use the 2nd Global War: Far Eastern Empire army list, although they have a purely sci-fi look.


Richard was defending, the scenario meant his army wouldn't break while he controlled the objective area in the centre. The 3 artillery in the far corner were going to cause a lot of trouble for a horde army like mine. The scenario allowed me to add new entry points on the sides of the table during the game but I decided the number of units I'd be allowed to bring on wouldn't be enough to deal with all the units defending them. Instead I aimed to pour into the objective from the opposite direction.


Seeing that I wasn't going to try to reach the artillery Richard sent his light tanks forward to engage my left flank, several off them breaking down. 


Richard had 4 units of Cyber-Samurai who were very good but also obliged to charge if possible. I moved my worthless thralls out of cover to trigger them. I could then shoot his premium troops without worrying if I hit my own thralls who neither react to fire or count towards my break point. As the Thralls started dying they pushed on into my enslaver units. I destroyed all four units eventually but I was unable to advance past them.


 My left flank collapsed rapidly under fire from the tanks and artillery.

On my right I opened a new entry point with the intention that the fast primitives would join with the advance already underway. They took a long time to get in position and Richard was able to reinforce the objective, replacing the elite warriors I had pulled out of it.


My beasts went in and lost the combat, they were then being shot at from the objective and the pile up of units was being bombarded by artillery.


Richard's hero went from unit to unit inflicting many hits. Here he attacks a heavy weapon squad (not teenage mutant ninja turtles) in red headbands.


By now my army was incapable of any offensive action and it was just a matter of Richard mopping up enough units to reach the break point. So we called it there.


My plan for drawing the cyber-samurai out of the objective and shooting them in the open was sound but I should have planned to move round them instead of through them because they hung around for a long time. I should have moved quicker on the right rather than hiding behind slow moving thralls, since they weren't facing that much firepower, then I could have got the primitives into the objective much earlier.

After the game 7 of us played an entertaining board game in which we attempted to flee our own city of Bristol and the plague, called Bristol 1350.


Saturday 10 July 2021

7TV Vegatable Apocalypse


The club is back in action and last week we had Chain of  Command, Blood Bowl, Alien Squad Leader, a pirate game (the rules are called Donybrook), and this game of 7TV.


This armies were 66 ratings (points) each, which was the value of my recently painted army cast I was keen to try out. The mission was 'the ambush' from the Apocalypse set. I had a 'Military Mind' (star) and 'Dependable Deputy' (co-star), a marksman, bazooka and machine gun teams and two sections led by corporals. Clive had a 'Mad Scientist' and 'Rampaging Monster', both co-stars and lots of plant based creatures from the Apocalypse set. Most of the figures are made by Crooked Dice who also produce the rules.

The McGuffin, an especially valuable objective, was placed in the tower in the centre of the table.


On the first turn wind blown seed pods moved into my rear on both sides threatening my intended advance but a good round of shooting destroyed them all before they could hatch. 

A countdown card allowed Clive to switch the positions of his rampaging monster and my dependable deputy, who was quickly thrashed to death by creepers. 


The mad scientist found himself in sights of the bazooka team who took an opportunistic shot at him but he was  saved by a bulletproof umbrella from the gadget pool. The bazooka soon had another problem to deal with soon so didn't get another try.


The monster moved into the section on my left taking out several models. Then he used his ability to become huge and became an even bigger threat.


Three creeper hounds swiftly moved down the flank ready to attack the already busy soldiers but I used the machine gun on them instead of the monster and killed them all in one round.


The huge monster took out more soldiers and was shot at a great deal soaking up hits, it regenerated a lost wound and avoided another by some other means but it finally went down with the Brigadier dealing the fatal shot with his pistol.


Despite the distraction I had sent two soldiers on the tower, covered by the other section on the right. A creeper had already been up there to claim the McGuffin but had been shot down immediately. 


Now a soldier climbed up and grabbed it. The mad scientist used a zip wire to get to the tower too, but he was also shot down by the soldiers on my right side. This creeper was also swiftly shot before it could get involved.

As I brought the McGuffin into the safety of the other troops more seed pods blew in and were destroyed. These creatures advanced and were a little harder to kill. An explosion caused by a countdown card set some of my soldiers on fire, but I was able to put them out.


The game ended with two regular objectives each, I had the McGuffin worth D6 victory points and had lost a co-star and a handful of extras. Clive had lost both of his co-stars and hordes of extras. Having most of my troops able to activate as units allowed me to get everyone working and having plenty of plot points to boost my shooting, while Clive's army having no leaders or units was unable make their numbers count because half of them were being left behind.