Sunday 28 April 2024

Never Mind the Billhooks

 Never Mind the Billhooks is a set of rules for the Wars of the Roses, mass battle.

In this game we had roughly equal forces. On the Yorkist side Steve had the left command and I had the right. Opposite with the Lancastrians was Bob on our left and Richard on our right. Most of had not played these rules before and John acted as games master. The figures are his, 20mm plastics.


We had the advantage in archery so we aimed to take out their archers first. We held our Knights back out of range of the enemy archers and cannon.


Archers on both sides advanced. Their cannon began inflicting casualties and killed one or two models almost every turn, except for when it was briefly blocked by their own cavalry.

On our left the Lancastrians moved onto the hill in force. We had some Skirmishers there and some Billmen on the other side of the wood.


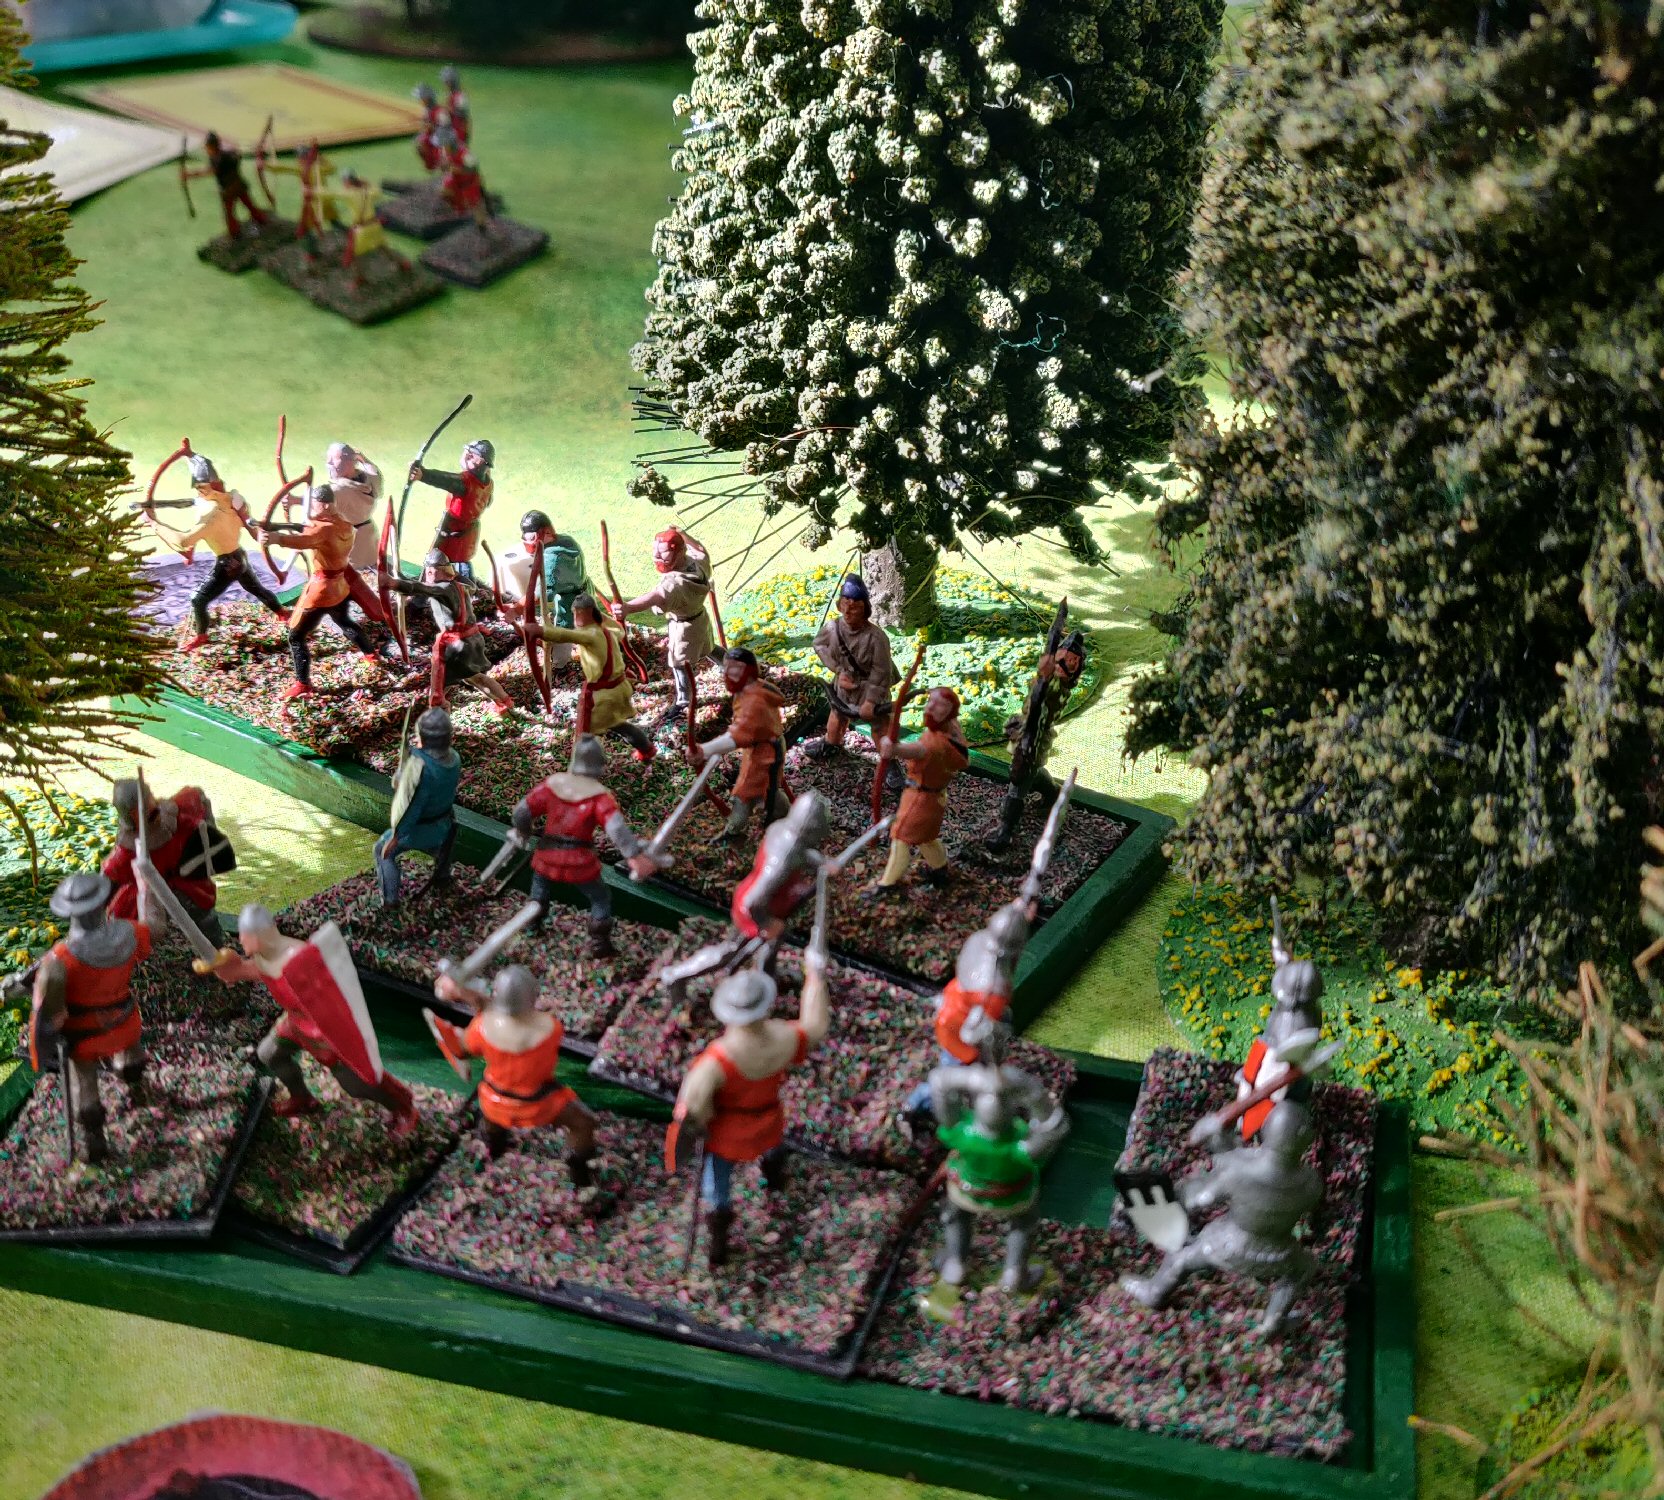
On the right my Archers were winning and my Skirmishers popped onto the hill and inflicted more casualties.

Lancastrian Billmen (not peasants as they appear) came to chase off the Skirmishers. After evading some charges they were left with multiple disorder tokens and facing the wrong way. I never had enough action points from my leader to spare to turn them around again.

The Lancastrian Knights moved into the centre and were met with very effective missile fire. This was also one of the very few occasions our cannon hit anything. A random event card gave us an extra unit of Skirmishers hidden in the village who joined in. The Knights were wiped out over two turns.

The Lacnastrians advanced down the hill and were intercepted by Steve's Men at Arms in the woods.


The Billmen facing my Archers withdrew after taking some casualties and their Men at Arms advanced towards us. One unit took very heavy losses from our Archers. In the village Lancastrian Men at Arms advanced and were met by a unit of our own.


It was time for some manoeuvering to get my spent Archers out of the way and bring up my Men at Arms on one side and Billmen on the other.


Richard's commander joined his Men at Arms charging my Archers and inflicted heavy losses but they stood their ground. My Men at Arms almost pulled off a flank charge but were stopped in their tracks by a special event card played by the Lancastrians. This then left them open to a charge from the other enemy Men at Arms.


On the left another unit of Men at Arms went through the village and charged our soldiers fighting in the woods in the rear. A couple of turns ago it all seemed to be going our way but the situation was now in the balance.

Our Men at Arms in the village broke and their opponents flank charged our Archers who had been about to do the same to their other unit.

Their Archers came down the hill to flank charge our Men at Arms in the Woods, things seemed hopeless.

     
And then the Archers unexpectedly beat their opponents who broke. They ran past the depleted Men at Arms who were in my flank on my side, causing them to rout too.

Our Archers were now free to attack the enemy rear, and on my side my Men at Arms were free to make their flank charge. Our own routers also rallied at this point. With all of their best troops destroyed, routing or sandwiched, and with our own Knights still intact and ready it was decided we had won the battle.

Sunday 7 April 2024

Living on the Front Line: rescue mission

Bristol 1979, civil war. The general has been captured by a local terrorist cell and intelligence indicates they have permission from their leaders to kill him in one hour. Three sections of anti-terrorist commandos launch a desperate rescue mission on the cluster of industrial buildings where he is being held.

This is a six player game using the rules: Living on the Front Line, a Winter of 79 game.  The GM was Clive who built most of the scenery. I was on the army side.

A factory, and workshops occupy the centre of the table with houses all around the outside. The location of the general is not known to the commandos but one of the upper level rooms seems likely.

Each turn, when the end of turn token is drawn from the bag, the player who acted last chooses how much time has passed by rolling a dice of their choice. For the first half of the game it was mostly our side and we rolled D4s to maximise the the time available to reach to the General.

Each of us has our own orders and my leader is determined to come out looking the best. Matt has the CinC, a machine gun and a section and enters from the open end at the North. Pete and I move from the south to scale the wall and attack the factory from either end.

My land Rover immediately comes under fire from an RPG on the roof, the first shot misses and the second hits, but fails to injure my disembarked troops. My leader is keen to be the first one over the wall, using the bonnet of the Land Rover on one side and a pile of boxes on the other to climb.

I was wary of using the gate in case it was booby trapped but as my leader ran past it was the red car that was rigged. He survived the blast and gunfire, all without a dice pip to spare. The man with him took out the RPG firer on the roof before being shot.


On the other side of the factory Pete got his troops over the wall and came under fire from the factory windows.

Matt drives into the courtyard on the North side and disembarks.

The machine gun claims one terrorist before being lost, and two more were quickly lost.


 The rest of my section head for the gate, one fires through the window and is killed by return fire. He is replaced and another commando enters the compound and fires into the room, his SMG jams.


My leader rushes into the building and takes out one terrorist but is then killed. My commando with the jammed weapon rushes in and throws a grenade at the two terrorists now in the corridor, killing one. The turn ends and I get the next initiative and charge into hand to hand, pushing the enemy back. Next door, having killed one enemy and stunned another my commandos climb through the shattered windows.

 Pete moves into the factory shooting at close range.

The enemy are able to shoot down from a gallery in the roof space. This part was kept to one side of the table for convenience.


Two Matt's troops fought through a building at the North end.

He put the Captain and a couple of others back in Land Rover which survived and explosion, and drove to a new location. The terrorists in the workshop started moving towards the factory.

The Captain went over a wall into a the factory yard. and attacked the central factory building, this being the one most likely to hold the hostage. The gunman on the roof turned his attention to Matt as all my guys were now inside.


In the main factory building we were taking heavy losses, about one to one which was too much as we were the smaller more elite force. Two of my commandos went down in the stairwell. Another blazed away at point blank range without hitting anything.

 Matt was fighting inside the central factory building, and soon down to two men. Matt would have to deal with two enemies on the ground floor and two more upstairs, and there were plenty more enemy ready to pour in after them. By now Pete had lost four and I had lost five, out of our original six each.

We decided it was now impossible to complete the mission and finished there.