Showing posts with label Lincombe Barn. Show all posts

Sunday, 23 October 2022

Lion Rampant: Robin Hood vs Guy of Gisborne

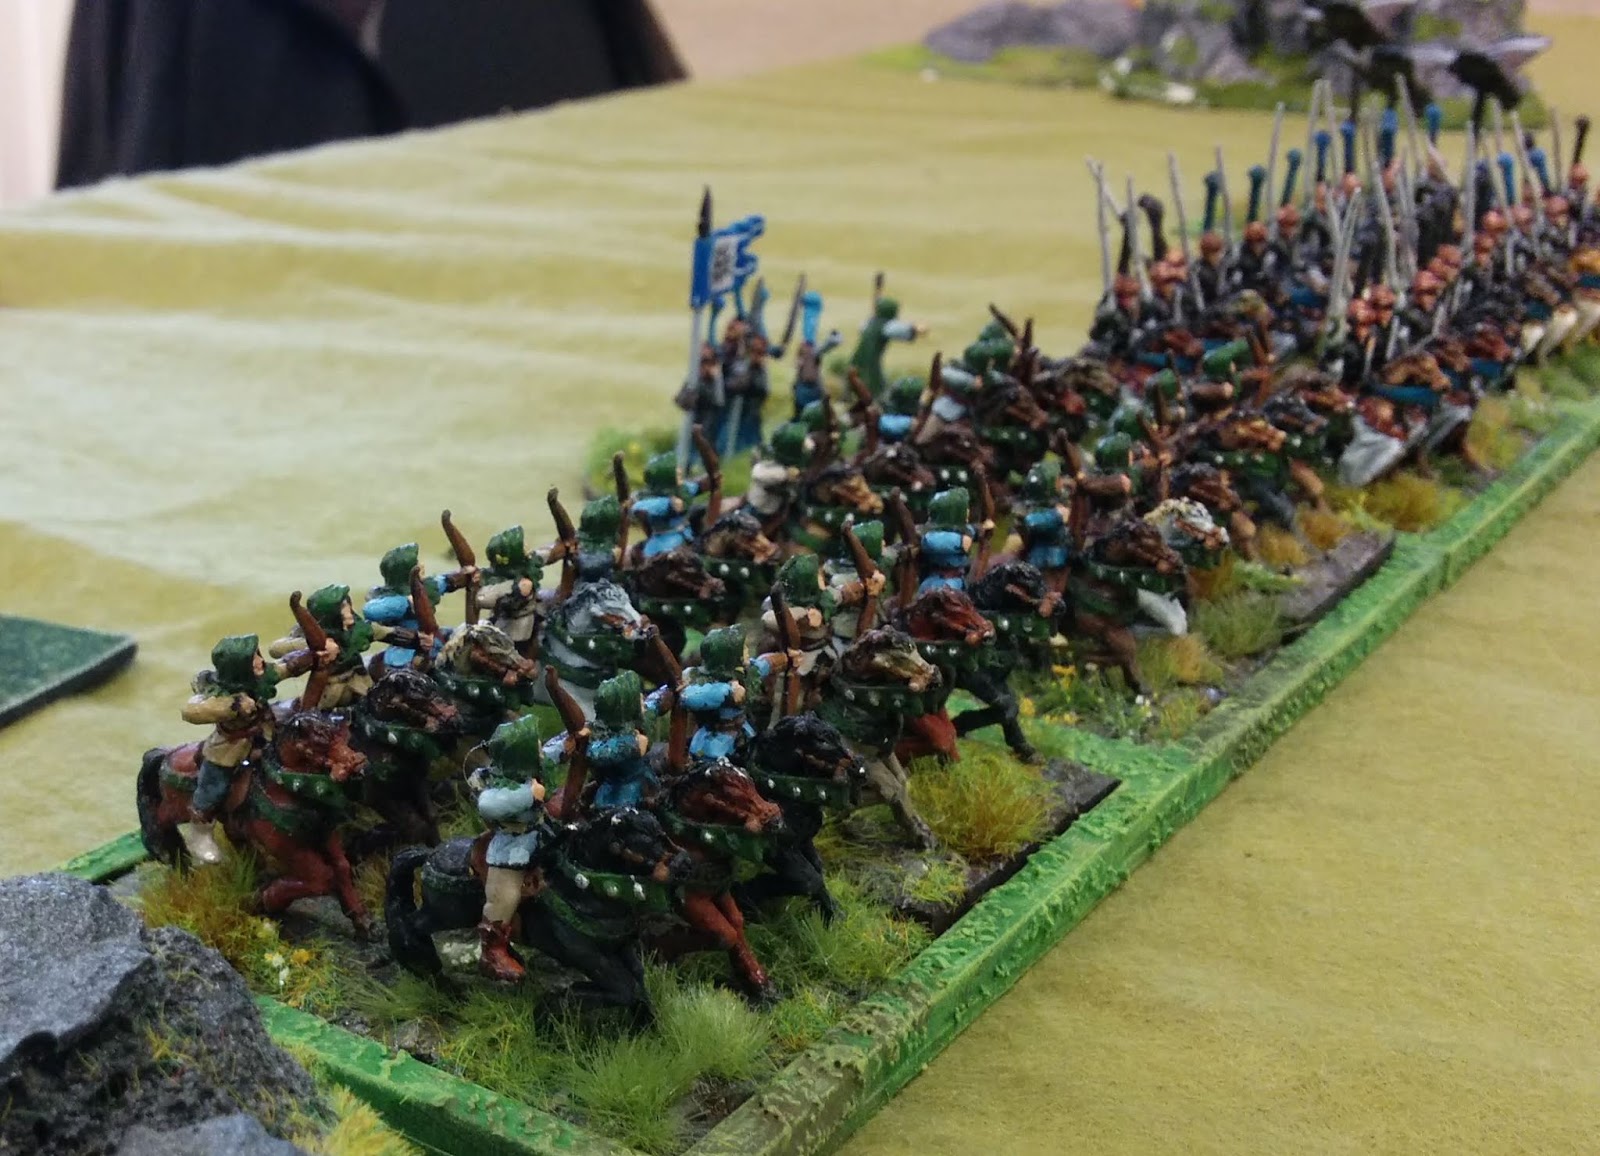
 Lion Rampant is published by Osprey and this game used the new 2nd edition with an unofficial Robin Hood list. Robin Hood and his inner circle form an elite infantry unit with bows, the rest of the army are two units of archers and four units of skirmishers. The Norman force has two units of mounted knights, one led by Guy of Gisborne, one unit of crossbowmen and three units of foot knights. 


The scenario requires the Normans to get three wagons from one corner of the table to the opposite corner. The Bandit force is deployed in all three remaining corners. I had Robin Hood and Kev had the Normans.

In the South West corner are archers and skirmishers, I planned to move towards the centre to get in range and shoot the convoy from there. Kev had other ideas though and sent the cavalry to attack them. The new mission became keeping the knights occupied while I tried to take out the wagons.


The skirmishers killed a knight as they fired and evaded, and another in the melee, in which they were unsurprisingly wiped out. The archers killed 2 more before they had to turn their attention to the second unit coming round the lake. They survived the first charge fairly well and killed 2 knights before being overwhelmed and fleeing.

The wagons moved forward, my skirmishers in the South East corner were slow to intercept them due to failed activation rolls. Robbin Hood's unit shot from the woods. 


 I had misunderstood the units given to me and had put down a unit of archers as two units of skirmishers, wasting their long range until it was noticed late in the game after they had been lurking in the corner until then.


I wiped out the crossbowmen escorting one chariot and discovering my mistake earlier brought my reclassed archers out to attack the next unit. The wagons wavered due to turns rallying and failed commands long eneugh to wipe out a second escort. 


By now the knights had crossed the table and quickly wiped out the skirmishers that were blocking the exit. I was able to reduce them with some more shooting as they threatened my archers.


A unit of foot knights closed on my skirmishers who held them off for a while, getting one kill each turn and the knights being shaken and having to spend the next turn rallying. Eventually the Knights got into melee and destroyed the skirmishers. With the remaining cart nearly off the table and no longer in reange for one unit and line of sight for the other my heroic unit charged the foot knights, reducing and shaking them in the first turn then destroying them in the second.

Casualties were high on both sides, victory was determined by the wagons, two were abandoned and one crossed the table giving victory to Robin Hood.


Saturday, 10 July 2021

7TV Vegatable Apocalypse


The club is back in action and last week we had Chain of  Command, Blood Bowl, Alien Squad Leader, a pirate game (the rules are called Donybrook), and this game of 7TV.


This armies were 66 ratings (points) each, which was the value of my recently painted army cast I was keen to try out. The mission was 'the ambush' from the Apocalypse set. I had a 'Military Mind' (star) and 'Dependable Deputy' (co-star), a marksman, bazooka and machine gun teams and two sections led by corporals. Clive had a 'Mad Scientist' and 'Rampaging Monster', both co-stars and lots of plant based creatures from the Apocalypse set. Most of the figures are made by Crooked Dice who also produce the rules.

The McGuffin, an especially valuable objective, was placed in the tower in the centre of the table.


On the first turn wind blown seed pods moved into my rear on both sides threatening my intended advance but a good round of shooting destroyed them all before they could hatch. 

A countdown card allowed Clive to switch the positions of his rampaging monster and my dependable deputy, who was quickly thrashed to death by creepers. 


The mad scientist found himself in sights of the bazooka team who took an opportunistic shot at him but he was  saved by a bulletproof umbrella from the gadget pool. The bazooka soon had another problem to deal with soon so didn't get another try.


The monster moved into the section on my left taking out several models. Then he used his ability to become huge and became an even bigger threat.


Three creeper hounds swiftly moved down the flank ready to attack the already busy soldiers but I used the machine gun on them instead of the monster and killed them all in one round.


The huge monster took out more soldiers and was shot at a great deal soaking up hits, it regenerated a lost wound and avoided another by some other means but it finally went down with the Brigadier dealing the fatal shot with his pistol.


Despite the distraction I had sent two soldiers on the tower, covered by the other section on the right. A creeper had already been up there to claim the McGuffin but had been shot down immediately. 


Now a soldier climbed up and grabbed it. The mad scientist used a zip wire to get to the tower too, but he was also shot down by the soldiers on my right side. This creeper was also swiftly shot before it could get involved.

As I brought the McGuffin into the safety of the other troops more seed pods blew in and were destroyed. These creatures advanced and were a little harder to kill. An explosion caused by a countdown card set some of my soldiers on fire, but I was able to put them out.


The game ended with two regular objectives each, I had the McGuffin worth D6 victory points and had lost a co-star and a handful of extras. Clive had lost both of his co-stars and hordes of extras. Having most of my troops able to activate as units allowed me to get everyone working and having plenty of plot points to boost my shooting, while Clive's army having no leaders or units was unable make their numbers count because half of them were being left behind.


Sunday, 18 October 2020

Cyberman v Sea Devils

 This is a 50 point game of 7TV using the Pulp rulebook and fan-made Dr Who profile cards from the 7TV Productions facebook group. All the models are from the old Harlequin range.


I had Cybermen. While the models depict 1960s Cybermen the stats are for the modern ones. They are very hard to kill and very expensive, I was outnumbered significantly. I had a Cyber-Leader and 5 Cybermen.Kev had the Master, the Myrka (a monster made from a pantomime horse which became an infamous example of bad special effects), a Sea Devil leader and a mixture of regular and elite Sea Devils.


The Scenario requires the Sea Devils to exit the table on my side carrying a 'Mcguffin'. The countdown cards left my central group unable to activate on the first turn, and the same group were knocked down by a blast on the second turn. The countdown card inbetween allowed my models a short free move but it soon became clear the Sea Devils were going to come to me as fast as possible anyway so the terrain wasn't going to have much effect.


A large group, forming a unit with their leader came down what I'll call the North of the the table. The two Cybermen did a great job. An early casualty was revealed to have been carrying the McGuffin which the Sea Devils crowded round to protect. With shooting and then despite being mobbed in melee I took out most of this lot.


The Myrka headed for my central group attacking the Cyber-Leader and one Cyberman. The Master tried to slip past but my Cyber-Leader was able to intercept him. Shots were fired, the Master was unable to use hypnosis against models with the Robot rule. We each had one gadget which now came into play, I moved into contact, the Master used a teleport ring to escape and I used a rocket pack to chase him!


At the South end of the beach it was one on one. After some shooting the Sea Devils charged, both were stunned and one then taken out with a second stun. A countdown card came up that required the next two cards to be drawn and played. One relieved everyone of statuses (like stunned), the other caused all Extras (non characters) to be knocked down. That was find by me, using an action to stand up delayed them exiting the board.


With time running out the remaining Sea Devils ran for the sea. One Sea Devil escaped with the McGuffin.


 In my last turn I had a great round of shooting, killing three more Sea Devils. This took Kev below half strength.  In his next turn the survivors  would have had to take morale tests, possibly running away, and I would have gained another victory point. However I'd chosen to take two countdown cards rather than one to end the game there and prevent more models escaping, so Kev didn't have another turn. This resulted in a draw. It was great to get these old models into a game at last and 7TV is always fun.


Saturday, 2 February 2019

Hordes of the Things Tournament 2019

On the 20th January we held our annual Hordes of the Things tournament (Barn HotT).


Armies were 24 points and each player played 4 games. We only had six players this year.


I took Owain Glyndwr's Welsh Rebels:
1    Hero General (Owain Glyndwr) @4pts          4
3    Warband (Javelinmen) @2pts                         6
4    Shooters (Longbowmen) @2pts                      8
4    Hordes (Peasant Spearmen) @2pts                 4
2    Lurkers (Longbowment in ambush) @1pts     2

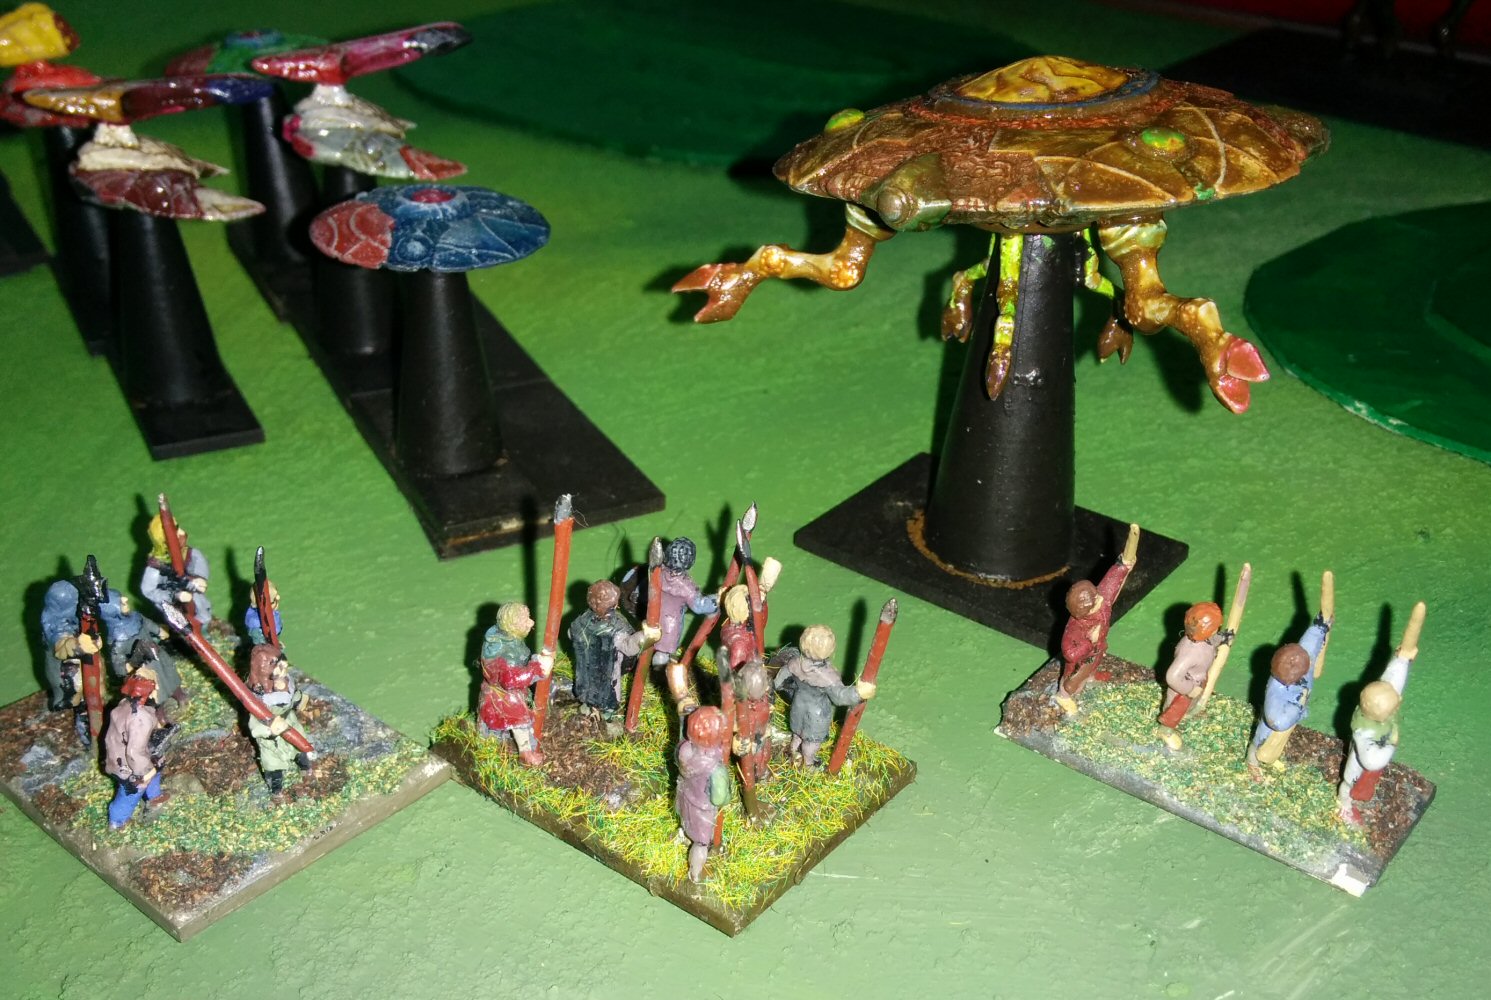
My first game was against John's Aliens. Despite appearances none of them are ariel, they are based on a Carolingian army template. I did my best to hold his Hero General in place with zones of control while shooting at it but to no avail. This was a win for John.


2nd game vs Steve's Elves. This army had 3 Magicians which made my Hero General very nervous. A combined magic attack early in the game could spell instant defeat.


 The infantry tried to hold a hill and were pushed back, the Hordes were dying and being replaced and marching back into the same combat, tying up the Magicians.


Owain Glyndwr ended up making flank attacks at the other end of the but my army broke, the final casualty being surrounded on three sides.


My third game was against Carol's Spaceships. This is the classic all ariel build used by the Puffins and the Weeping Angels, seen in tournaments (look at the January 2018 post on this blog to see the Puffins!). Ariel Hero General, Ariel Hero and 6 Flyers.


I was attacking, there was a river down the centre of the table, and I was lucky to get the board orientated so I didn't have to cross it. I deployed my whole army on the same side of the river as the enemy stronghold with a column of Hordes ready to tie up the inevitable attack from the side.


My General made a dash for the stronghold but was intercepted by an Ariel Hero and killed, ending the game. Having time to spare we played a friendly game and this time I won by destroying all six Flyers with my Shooters.


With so few players, and using the Swiss Chess format I ended up playing John for a 2nd time in the final round. Players have to stick to one army for the competition but given the circumstances we both brought out a spare army and played my Dwarves vs his Chess Pieces. The army naturally included Bishops as Clerics and Pawns as Hordes.


I gradually wore down his units and one of my Heroes made several attempts at the stronghold from the side, fleeing and then returning. The Dwarves were victorious

Brian is a new convert to HotT and borrowed Carol's Renaissance army featuring Leonardo Da Vinci's Turtle Tank.


Keith was the winner, with the number of Generals killed being the tie-breaker. His army were Pumkins.


Thanks to those who came to take part, thanks to Nick for running it.
Barn HotT 2020 will be the same time next year.


Friday, 12 October 2018

Sword and Spear Fantasy, Barbarians vs Elves


Last year a club member introduced us to Sword and Spear by Great Escape Games, followed by its fantasy variant. We played in 28mm and at least 4 of us got ourselves the rules and started building armies in 15mm which are now ready and getting some use.

My army was 1,200 points minus the hero (riding a pegasus) that was missing due to one of it's wings going missing, Carol's was more like 1,500 but she brought it down to a similar level by fielding fewer deeper units. This was the first time out for the Elves.

Carol's barbarians are from the Copplestone Castings 15mm Barbarica range (although they're more like 18mm tall). They are great sculpts and are like miniature versions of the 28mm ones he did for Grenadier long ago. Most of the barbarians units have either Impact or Powerful Attack, both of which cancel out my troops' armour in the right circumstances. The big units of infantry are harder to maneuver but have an extra attack dice and can take more damage.

My Elves are from Magister Militum, and are also quite tall for 15mm figures. There is very little variety which is ok for the regular types but not so good for the light stuff. The giant eagles are from Kalistra.They started out as a 24 point army for Hordes of the Things which I have expanded fourfold for these rules.  The spears and longbows are armoured and the knights are heavily armoured, this would be useful if the other side didn't have Impact and Powerful Attack on most of the units.

Each side has a general, two captains and two wizards. Wizards in these rules can boost other units with extra dice, range or movement, heal damage and make their own ranged attacks.

We both deployed with our infantry facing each other (on my left) and our cavalry facing each other (on my right). Having a smaller army I didn't want to defend too long a frontage so the plan was to move the foot onto the hill and stay there, and turn the cavalry to face outwards on the side.

I got onto the hill and repelled a series of charges. Using magic and moving my commanders back and forward I was able to keep rallying them and restoring them to full morale. Carol's wolves and a frenzied cave dwellers were destroyed and her giant was killed by longbow fire, so far so good.

When things started moving on the right my luck changed, my horse archers made little impact before being flattened by the barbarian cavalry.

My Knights moved forward and the eagles charged hoping to protect the rear, the eagles too were destroyed in the first combat. The Knights did dismally against barbarian infantry and trolls and were both destroyed.

Being inexperienced with the rules we were keeping things casual and hadn't kept track of  break points. At this point my army was probably close to breaking with my prestige units and three others gone but we carried on regardless

I had been using my activation dice defending on the hill and throwing on the right so I still hadn't brought my now unengaged left round to flank Carol's infantry. I belatedly moved some light foot and archers round to do some shooting and chased after some light foot. Now a horde was closing on my line and, having other enemies to the front my infantry couldn't redeploy to face them and there were a succession of fights where units were attacked on two sides with predictable results.

Unlike games like Warhammer, Warmaster or Kings of War you don't sit passively for long periods while your opponent completes their turn. Instead each turn is divided into phases and both players activate units in each phase assuming some of their dice come out of the bag. This keeps means there's never a dull moment.